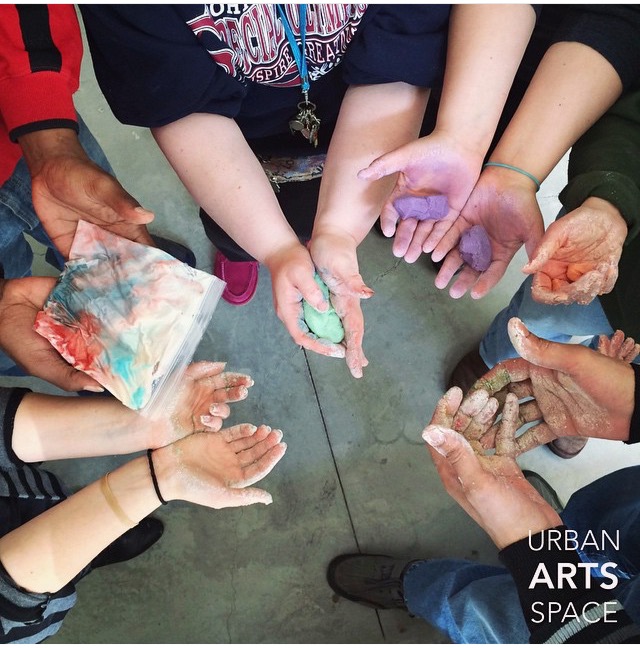
This lesson will use a different medium, dough, to explore the properties of color mixing that the students were introduced to the week before. We will review the color lessons and vocabulary that was covered last week, talking about primary and secondary colors, and how to make different combinations. The work from the previous week is passed back, and students have an opportunity to share their pieces with each other, pointing out the many different colors, tones and tints that they were able to create with just three pigments of paint.
After review of color theory, students are asked about experiences with using dough or clay. Many have had some form of experience with play dough or baking. We talk about the idea of texture and feel in a three-dimensional work of art or material. Students describe different textures that they may feel from different materials and combinations of objects.
Next, student attention is called to the front where the instructor stands with the large mixing bowl and dough ingredients. Using two parts flour, two parts salt, and one part water, I slowly combine ingredients to begin forming a dough like substance. Students watch, and are invited to touch the dough as it is in stages of mixing, describing how it gets transformed from watery to sticky to solid molding clay, much like if you were to make cookies. With a large batch of beige dough made, the instructor pulls a small chunk out from the bowl, squeeze it with her hands to show students its malleability.
Now for the real fun. I again tell the students I would like to make my clay green, and they direct me to use blue and yellow food color to achieve this. Adding the dye in to my small blob, I show the students different ways to manipulate the dough by rolling, squeezing, pulling and squishing to make the colors blend together. At times, the dough looks marbled with distinct swirls of blue and yellow, but eventually, it all blends together in an even green color.
Now students decide which colors they would like to combine in their own blobs. They are provided with paper plates to contain the dough as they work, and are offered plastic bags to put the dough in to squeeze it through if they are wary of stickiness or getting any colors on their hands. Students are now free to blend the colors in their dough by playing with it. They are told that they do not need to create a final form – there is no expectation of a finished clay model or sculpture, but can experiment in molding shapes or cutting out differed forms. Students are encouraged to share pieces of their dough with their friends, and experiment with mixing different color combinations.


